Rules
The loyalty track, 7 squares
Data last checked: · how we verify numbers
The Hogwarts Loyalty Track is a 7-space rail on the Side Board, and every House parks one pawn on it from setup — a pawn that never explores the map [official, p. 7, p. 18]. Advancing it is the only route to the game’s two prize items: the Dark Detector and, through the Room of Requirement it unlocks, Dumbledore’s Army Coins [official, p. 18–19]. The catch that gives the page its tension: while you push that track, every Replenish you take also marches the Dark Arts Marker one space along its own path [official, p. 17, p. 22].
What the track is
Seven squares, printed on the Side Board next to the Dark Arts Path [official, p. 7, p. 18, glossary]. Setup step (l) places each participating House’s fourth pawn on the track’s first space, and it stays there for the whole game — it is a loyalty meter, not an explorer, which is why a House Player only runs 3 pawns on the main board [official, p. 7]. Your track pawn and your board pawns are independent: nothing you do to one affects the other, except through the advancement rules below.
The three ways to advance
Four triggers move a track pawn forward, all restated from the rulebook’s Loyalty Track rules [official, p. 10–11, p. 18]:
| Trigger | What happens | Cost | Amount |
|---|---|---|---|
| End a move on a main-board space with the Dark Detector icon | The pawn advances 1 space on the track | None — just get there | +1 space |
| Play a card whose effect advances the track | Resolve the card’s stated advancement | The card itself (as usual) | Per the card |
| Discard 2 cards for an Advanced Acquire Row card (Learn action) | The advanced purchase also steps the track | 2 discarded cards | +1 space |
| Discard 1 card for an Advanced Acquire Row card (Card Acquire Bonus Space) | The Bonus Space’s advanced option also steps the track | 1 discarded card | +1 space |
Note the two advanced-purchase prices differ by context — the Learn action charges 2 discards, the Bonus Space only 1 [official, p. 10, p. 17].
Every Replenish feeds the enemy
The track does not exist in isolation; it shares an economy with the Dark Arts Marker, and the rulebook prices that trade openly [official, p. 17, p. 22]:
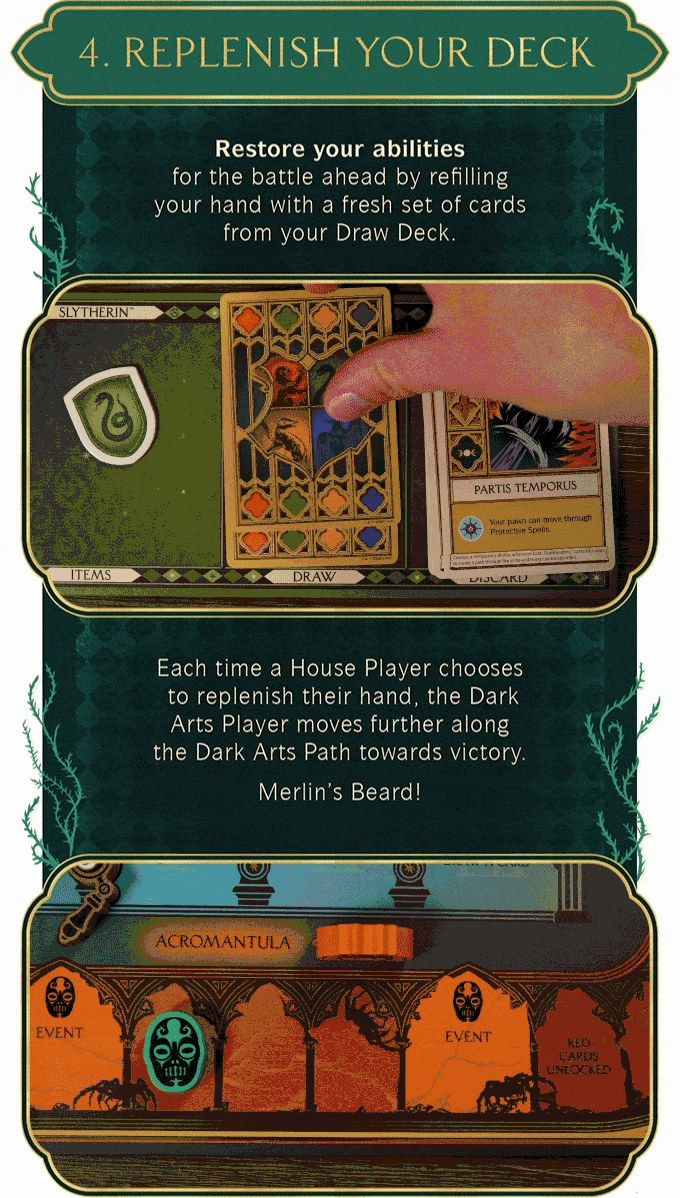
- Every House Player Replenish — the hand-refill you need to keep playing — advances the Dark Arts Marker 1 space along the Dark Arts Path.
- Certain Event Cards advance the Marker further when they resolve.
- The Dark Arts Player collecting all House Markers through bumps advances it 1 space once, then hands the Markers back.
- The Dark Arts Player’s own Replenish never moves the Marker, and plain card draws never move it either [official, p. 12, p. 22].
Rulebook check
The more you refill, the stronger the enemy: the game’s central tension sits right on this track [official, p. 22]. The three triggers that push the Dark Arts Marker are the same actions a healthy turn needs — refilling your hand, surviving events, recovering from bumps — and the loyalty track’s fastest fuel, the Advanced Acquire discard of 2, empties your hand faster too. In practice this makes Replenish a meter you spend rather than a free reset [our analysis]: every point of loyalty you buy is priced in Dark Arts progress, and the winner is whoever spends the meter more slowly than they finish the shield checklist.
Square 5: the threshold
Square 5 is where the track starts paying out — two of its three prizes hang on that single threshold [official, p. 18–19]:
- The Dark Detector — if, after moving your track pawn, it stands on space 5 or higher and higher than anyone else’s, you immediately gain the Detector. The rulebook adds a tiebreaker: if two players reach the same space, whoever got to 5-or-higher first holds it.
- The Room of Requirement — the first time any House Player reaches or passes space 5, the Room is revealed and its board piece is added to the main board. From then on, a House pawn whose move ends on the Room’s space gains 1 D.A. Coin from the supply.
- The Room’s shutter — the Room closes and is removed from the main board when all House pawns fall below space 5. A pawn caught inside must stay there until the Room is revealed again — plan for the dip, not just the arrival [official, p. 19].
The seventh square: a track pawn reaching the final space stops advancing and gains the Dark Detector if not already held. If another player’s pawn occupies that space holding the Detector, the arrival takes it — the previous holder drops back 1 space and draws 1 card from their Draw Deck to hand [official, p. 18].
The Dark Detector: one item, whole table
There is exactly 1 Dark Detector in the game, and the loyalty track dictates who holds it [official, p. 12, p. 18]. It is the third item required by the 3 shields printing its symbol — the other 3 want a D.A. Coin instead, and the two are never interchangeable [official, p. 12]. Its life cycle [official, p. 18]:
- Won on the track: space 5+, ahead of everyone, immediately after the move.
- Spent on a shield exchange: your track pawn retreats 3 spaces, and the Detector returns to its Side Board space.
- Passed on: if another player has already reached space 5 or higher when you spend it, the Detector goes straight to them rather than back to the Side Board.
Because the Dark Detector icons on the main board are themselves one of the advancement triggers, the item and the track reinforce each other — holding the Detector usually means you are also best positioned to keep advancing [our analysis]. What its possession is ultimately worth: see Defence shields: how to win.
Dumbledore’s Army coins
Four D.A. Coins sit on the Room of Requirement board piece, off-board until the track reveals the Room [official, p. 6, p. 19]. Joining Dumbledore’s Army — the rulebook’s framing is training with the DA in the revealed Room — grants exactly one thing mechanically: the coin, obtained by ending a pawn’s move on the Room’s space, one per entry [official, p. 19]. Hold at most 1 at a time; gather more only by spending the first on a shield exchange [official, p. 19].
That is the entire mechanical payoff, and it is not a small one: the 3 coin-symbol shields are unreachable without this path, so the loyalty track is the gatekeeper for all six shields — Detector-side directly, Coin-side through the Room [official, p. 18–19; our analysis].
Watch it explained
Chapter deep links into the official MinaLima how-to-play video; timestamps verified against the video’s chapter markers on 2026-10-13:
- The Hogwarts Loyalty Track (9:03)
- Acquiring the Dark Detector (9:51)
- Acquiring Dumbledore’s Army coins (10:40)
Sources
Official rulebook PDF, MinaLima — setup p. 6–7, items p. 11–12, Loyalty Track p. 18, Room of Requirement p. 19, Dark Arts Path triggers p. 22, glossary p. 25–29: media.minalima.com — Defenders of Hogwarts rulebook. Video and chapter timestamps: MinaLima Design, “How to Play: Defenders of Hogwarts ⚡️”.